|
469-298-1138
Home
Send In Form
FAQ's
Estimates
Feedback
Email A Tech
Search
Payment Types
Contact Us
Prices

ACCORD
ACURA
AUDI
BMW
BOSE
BUICK
CADILLAC
CHEVROLET
CHRYSLER
CIVIC
CL
CONTACT
CRV
FAQ
FEES
FEEDBACK
FORD
GM
HONDA
HYUNDAI
INTEGRA
ISUZU
INFINITI
LEGEND
LEXUS
MAZDA
MAXIMA
MERCEDES
NISSAN
NSX
ODYSSEY
PASSPORT
PATHFINDER
PONTIAC
PRELUDE
RL
SUBARU
SUBMIT
TL
SALE
TOYOTA
| |
2.2 2.3 3.0 CL
CL Removal Tips
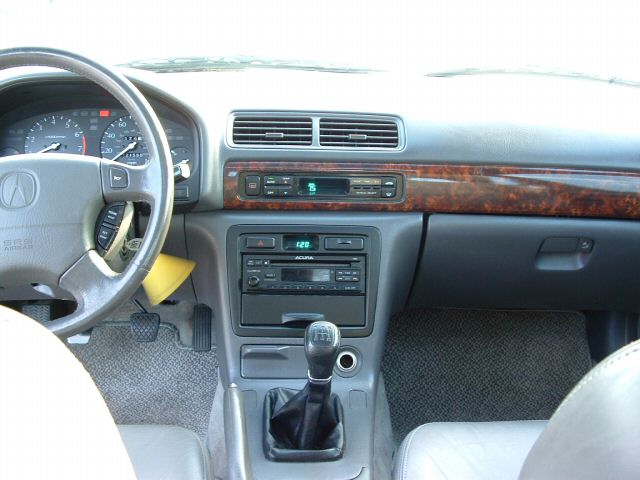
1997 2.2 & 3.0 Stereo Removal Tips.
The piece of dash that goes around the stereo and around the pocket below it
will snap off with the Hazard Switch and Clock attached to it. You can use a
regular screwdriver, don't pry from the outside of the rim, start with the
pocket's door open and slide the driver in the bottom left and right inside
corners of the piece to force it off. Once it's off and out of the way, you'll
need to remove the 2 screws below the pocket. We found it easiest to move the
stereo and pocket up a little in order to get the Phillips screwdriver under
there and take the screws out, you'll need a 6-7 inch long Phillips or
5/16" socket - those 2 are all that is holding it in.

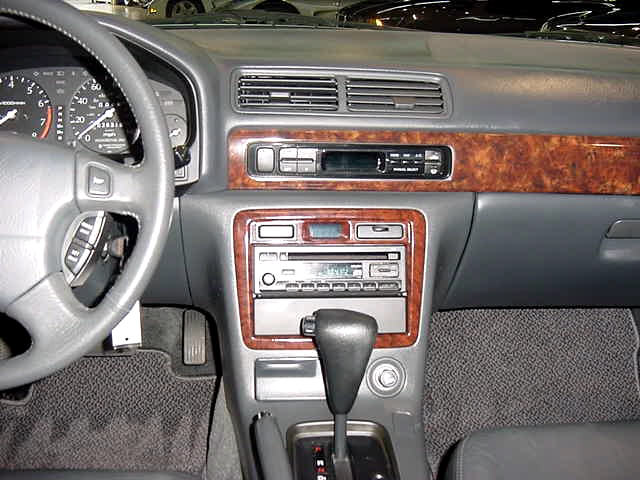
1998-1999 2.3 & 3.0 Stereo Removal Tips. Start by removing the armrest that is
between the front seats. The way it comes off is by opening the armrest, empty it
out, and use a screwdriver to pop up the hidden door at the bottom. Then remove
the 2 screws and there is another screw under the drink holder. Pull up and
remove the drink holder to see it. Then, with the emergency brake handle pulled
up, you can lift off the armrest and cup holder area of the console. Now you can
get to the 2 screws that are near the shifter and hold down the plastic that
goes around the shifter and up around the radio. Be sure to remove the ashtray
and remove that last hidden screw in there before moving that piece from around
the stereo (the rest unsnaps). There is a connector to the wiring that
goes to the lighter, unplug it to move that over and out of your way to get to
the 2 screws under the pocket holding the stereo in. 
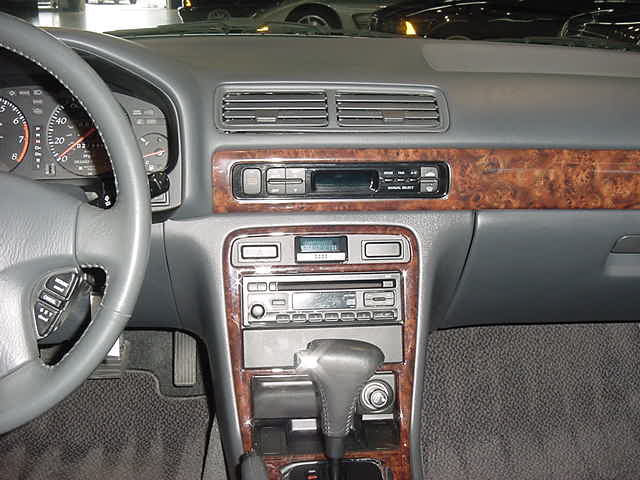
2000-2002
3.2 Stereo Removal Tips Start
by emptying the console between the seats, In the bottom level there is a piece
of pad on the bottom, under it is two screws (remove). Pry off the plastic ring
around the shifter, it just pulls up, notice the shift lock, you may need to
keep the parking brake on and use the shift lock (just press down even with a
screwdriver) to move the shifter back and out of the way. The plastic wood grain
trim strips along each side come off, start by the end that is under the door of
the center compartment, between the seats, pull up (unsnaps). Move the side big
panels which have 2 screws on each side and the front by the steering wheel has
a screw. In order to see this front screw, you'll need to unsnap the cover that
goes under the steering wheel from it's right side, this will reveal the screw.
You can see 2 round silver phillips screws on each side of the radio's side, and
4 black phillips screws around front edge (remove). Now, you need to move the
plastic that is in front of the shifter and holds the seat warmer switched.
Start by pulling out the door right in the middle, under there, that
hides/covers the computer connector, it is between the seat switches and back in
there, just use fingers and it pulls out. There are 2 large phillips screws to
the left and right of the computer connector that hold the plastic in place
(remove). The seat switches will need to push out of there mounts and be
unplugged. You can get to the connectors from the sides, this is a little tough
but once unplugged the switches can come up out of the plastic, you may need to
press the clips on the side towards you to help them release. The plastic
holding the switches comes out but it may need to stay in place until the
switches are out because of the clearance the switches need to move up and out.
Wiggle the radio out enough to unplug it from the right side. There
are two connectors that have slim releases on the top of them and the antenna
just pulls out. Reach in behind radio on the right side to unplug.
2003 3.2 Type S Stereo Removal Tips
Start
by emptying the console between the seats, In the bottom level there is a piece
of pad on the bottom, under it is two screws (remove). Pry off the plastic ring
around the shifter, it just pulls up, notice the shift lock, you may need to
keep the parking brake on and use the shift lock (just press down even with a
screwdriver) to move the shifter back and out of the way. The plastic wood grain
trim strips along each side come off, start by the end that is under the door of
the center compartment, between the seats, pull up (unsnaps). Move the side big
panels which have 2 screws on each side and the front by the steering wheel has
a screw. In order to see this front screw, you'll need to unsnap the cover that
goes under the steering wheel from it's right side, this will reveal the screw.
The panel by the standard shifter needs to be be remove, there are screws
holding it and it unsnaps. You can see 2 round silver phillips screws on each side of the radio's side, and
4 black phillips screws around front edge (remove). Now, you need to move the
plastic that is in front of the shifter and holds the seat warmer switched.
Start by pulling out the door right in the middle, under there, that
hides/covers the computer connector, it is between the seat switches and back in
there, just use fingers and it pulls out. There are 2 large phillips screws to
the left and right of the computer connector that hold the plastic in place
(remove). The seat switches will need to push out of there mounts and be
unplugged. You can get to the connectors from the sides, this is a little tough
but once unplugged the switches can come up out of the plastic, you may need to
press the clips on the side towards you to help them release. The plastic
holding the switches comes out but it may need to stay in place until the
switches are out because of the clearance the switches need to move up and out.
Wiggle the radio out enough to unplug it from the right side. There
are two connectors that have slim releases on the top of them and the antenna
just pulls out. Reach in behind radio on the right side to unplug.
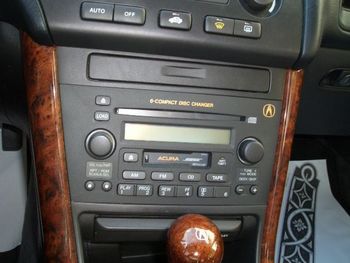
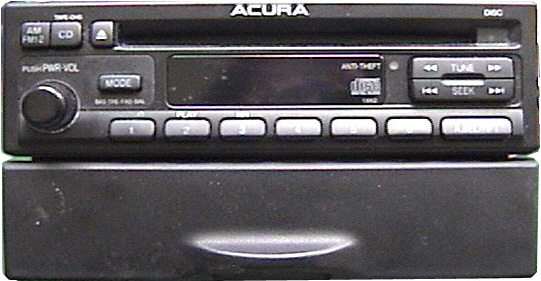
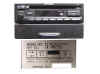 1997 & 1998 Acura CL stereo
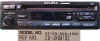
We repair these Acura CD players that skip or won't play CD's.
The CD changers are repairable also, see the changers link on the left. Many
times when not working correctly the cd players will show an error code on the
display like E-01 PEO P-EO or Err1-3
Below are problems we have repaired.
CD (single)
Error code "PEO" on display
and won't play CD's at times.
Won't eject, accept, or read (skips) CD's.
The below problems are in the changer usually mounted in the trunk.
Easy steps for the repair.
-
You have many options with something that isn't working
properly. The first step is to understand why you would want to repair instead
of replace the unit. See "Why is repairing a good
option"
-
Verify where the problem is and what needs to be repaired.
Many times this is obvious (like on cd players that skip) but sometimes not
so clear like sound that comes and goes (is it speaker, the amp, or stereo).
Email
a tech if you need help with figuring out where the problem is.
-
Review our estimate info here.
-
Remove it or have someone remove it for you.
-
Print off the Send in form to enclose with the
changer (all info needed is on the form, address, email, etc.)
-
Wrap it good with some bubble-wrap to protect.
-
All the carriers deliver here (UPS, USPS, FedEx, etc.) Allow under 1 week for
the repair, we'll contact you if need a few days longer for parts ordering.
-
Note: We will return everything that is sent in whether it's
cd's or brackets, all will be kept together.

|